Looks like we are stuck inside today on this wet rainy and soon to be snowy day. We have been trying to stay away from potatoes the past couple years but lately I have been bringing them back into our routine. So today is a perfect day for potato soup. This recipe can adapted to your liking by omitting all or some of the vegetables if you don’t like them. It will definitely warm you up and keep you full and cozy on a nasty winter day.
Potato Soup
6 slices of bacon coarsely chopped
1 cup carrots chopped
1 cup celery chopped
1-2 cloves garlic chopped
1 medium onion chopped
5 medium russet potatoes peeled and chopped
32 oz. Chicken broth
2-3 cups heavy cream
2 T. Butter
1/2 cup water
2T. Flour
1 T. Died parsley
2 tsp garlic powder
1 T. Salt
1 tsp. Black pepper
1 cup shredded cheddar cheese

In a large stock pot fry the bacon until crisp. Remove bacon from pot and add all the chopped vegetables except potatoes. Sauté vegetables for about 20 min on low heat and then add potatoes, chicken broth, and parsley. Cover with lid and cook on low until potatoes are tender. Use potato masher or for a smoother soup use a hand blender to break up some of the vegetables and potatoes. Add the cream. Mix together the water and flour and add this slurry to the pot. Stir well. Allow soup to thicken. Add the garlic powder, salt, pepper and cheese. You can add the cooked bacon back into the pot or use it for garnish in your bowl. Stir well. Let simmer for 5-10 min and serve.
If you don’t like the vegetables, simply leave them out and add extra potatoes. The same goes with any seasoning or cheese. Use whatever you like, add more cheese if you like, this recipe is very versatile. Use a different kind of cheese like Gouda, Parmesan, Swiss or a mixture. Add spice to your soup with some smoked paprika or cayenne.
I love to serve this with some crusty bread and top with cheese, bacon and fresh parsley. Enjoy!
My dad loved corn. He especially loved eating it straight off the cob. We laugh at the memories we have of him slicing a slab of butter, laying it on one end of the cob, and starting with the slab butter, he ate down the cob of corn to the other end. Then he would turn the cob a quarter turn and repeat with another slab of butter, until he had finished the whole ear of corn. It always reminded me of the old cartoons of crows eating corn; they ate down the cob, then made a “ding” sound like a typewriter, spin the cob, and repeat! And that’s exactly how daddy ate corn without said sound effects. We raised sweet corn to eat and field corn to use for silage. However, we did grab a few ears of field corn once in a while to eat. It’s usually bigger but not as sweet.
Every summer we would shuck about 200 or more ears of sweet corn to put in the freezer. I remember standing out by the fence shucking corn and throwing the shucks over the fence to the cows. Most of the time, you will find a few worms that started munching on the tops of the cobs, if it wasn’t too bad you just flicked them off and went on, but if they had eaten more of their share, we broke that part off and sacrificed it to to cows. Dad always said, “be sure you break those cobs up so the cows don’t choke on them.” It’s funny how as a kid, I never thought about how much work goes into picking, shucking, cutting it off the cob, blanching and storing the corn, however now that I’m doing it as a middle aged woman, I can attest that it’s a lot of hard work. Now I know why mom and dad always got them a chair to sit on while shucking corn next to the fence.
Mom cut the corn off the cob either with a knife or using a contraption that was made for this task that consisted of a piece of wood that was concave with a blade in the middle. I’m not really sure if this contraption has a name, but I still have it in my possession but I don’t use it anymore. (See pic below). I have used a mandolin to cut corn off the cob which is similar to the thing mom used. The only downfall to either of these gadgets is the safety issue that if your not careful you could lose a fingertip in the process. Of course a knife works too and you still have to watch your fingers, but thanks to the wonders of online shopping, I have actually found a tool that is especially made for this and I really like it. So let’s talk about cutting corn off the cob.
After you shuck your corn, you need to rinse it and try your best to remove any remaining silk that is still on the cob. I use a soft bristled scrub brush and brush down the cobs following the pattern of the kernels. It’s a personal preference how much silk is left, it doesn’t hurt you to consume it. My mother would stand at the sink for what seemed like hours using a brush and knife to remove everyone of those silks….me not so much. Make sure your corn is clean and cut off any worm damage or unwanted blemishes. Some people blanch their corn prior to cutting it off the cob, I do mine afterwards. Again, it’s personal preference. I suggest if you’ve never done any preserving, the Ball Blue Book is a great reference as well as internet searches. This is only my experiences and I do not take any responsibility for unsafe preserving practices. Okay, I had to get that little clause out of the way because well, some folks take an unliking to my preservation practices.
This is an easy tip for cutting it off the cob: use a large bowl with a smaller bowl placed in the center of the large one. Hold the cob on top of the smaller bowl as your cutting off the kernels. This allows them to fall into the large bowl easily without making such a mess. If you like whole kernel corn this is it. If you like cream style, you will scrape the cob. Using the blade of a knife, scrape the remaining corn “milk” from the cob. This does make somewhat of a mess but it’s something I’ve always done. I blanch my corn for about 20 mins on the stovetop. Heat your corn to a simmer and let simmer for about 15-20 minutes, being careful not to scorch the bottom. Small batches work better than large ones. Once you have your corn blanched, remove it from heat, transfer to another bowl and place that bowl in an ice water bath to cool the corn, stir periodically to prevent hot spots. Once your corn is completely cool you can put a desired amount in a freezer proof container of your choice. I use quart size freezer bags. I usually put approximately 2-3 cups in the bag, zip almost shut leave a space for air to escape, lay flat and compress most of the air out of the bag and zip shut. You can use a vacuum sealer, however I have not had much luck with mine. Label your bags and freeze flat.
Beautiful Sweet Corn – Shucking
Using a smaller bowl in a larger bowl for less mess
Tool my mom used.
My new Amazon corn tool!
Whole kernel on left, scraped cob or cream style on right
To freeze on the cob. I’ve done it shucked and leaving the shucks on. For the shucked corn: clean it, blanch it, cool it and put desired amount in bags and freeze it. This is when my vacuum sealer works best. Gallon sized freezer bags work well also.
For the unshucked corn: basically pull a few of the outer shucks off leaving the inner shucks on the cob, making sure it’s clean and free from insects. Remove the silks from the top and place desired amount in bags and freeze. I have had some people tell me that they don’t remove anything nor do they bag it, simply pick it and throw it in the freezer. I’ve never tried that but the older I get the more enticing that seems.
Some people preserve corn by canning it in jars. I have never done this because we always have freezer space. However, if freezer space was an issue, I would certainly recommend it. Again consult safe preservation practices.
There are endless possibilities to corn recipes. There’s the obvious, eating it on or off the cob just as is, or with a little salt and butter, or there’s plenty of other ways to use your frozen corn. I am listing a couple family recipes that are enjoyed throughout the year.
My mother made this dish often. It’s simple yet flavorful and pairs well with just about any dish. For a simple twist, add in cooked smoked sausage, ground beef or any meat protein for a simple skillet meal.
Corn & Rice
4 T. Butter
1 cup chopped onion
1 cup chopped bell pepper, any color
1 cup dry rice, any kind
1 1/2 cups of whole kernel corn
2 cups water or chicken broth
1/2 tsp garlic powder
1/2 tsp salt
1 tsp black pepper
In a medium to large skillet melt butter. Add onion and pepper and sauté until they are barely soft. Add rice. Toast rice until you have a nice golden brown color on the rice. Then add corn and water or chicken stock. The chicken stock will just add another layer of flavor. Cover and allow to simmer, stirring occasionally until all liquid is adsorbed or until rice is tender. Add a little more liquid if necessary to cook the rice thoroughly. Once the rice is tender, add garlic powder, salt and pepper and mix well. Turn heat back up, stir rice mixture making sure it don’t stick. Brown until you get the consistency of fried rice. Remove from heat and serve. Enjoy!
Another way to preserve your corn is to make Corn Relish. It’s a sweet and savory relish that not only tastes good but makes a very colorful gift. My grandmother made this relish and we ate it on everything from beans to hot dogs. The cabbage is optional and I do not use it most of the time because I may not have it on hand, but Grandma always did. It’s great either way.
Corn Relish
20 ears of corn, or about 18 cups removed from cob
1 large head of cabbage (optional)
6 each read and green bell peppers (12 peppers total)
4 large onions
6 cups sugar
3 T. dry ground mustard
3 T. celery seed
3 T. ground turmeric
3 T. canning salt
5 cups white vinegar
1 cup water
Chop cabbage, onions and bell peppers to small dice, or use food processor and shred. In a large stock pot, add corn, all chopped vegetables, sugar, spices, vinegar and water. Bring to a boil, turn down heat and simmer for 30 minutes. While your letting this simmer, prepare your jars, lids and ring by sterilizing them in a hot water bath. Also fill a water canner with water and bring to boil. After your corn mixture has simmered for 30 minutes, use a slotted spoon to fill your jars with the relish, then ladle the hot liquid over the relish leaving a 1 inch head space at the top of each jar. Clean rims of jars and place on lids and rings, finger tighten only. Place jars in water canner and process for 10 minutes. Remove onto a towel to cool. Jars should seal once cool. If you have one to not seal, either reprocess or place in refrigerator to eat. Enjoy!
So I hope you’ve enjoyed another blog post from this crazy farm girl! I sometimes find myself thinking “Do people even read these?” Even if nobody does read them I’m compiling memories for my family to share and hopefully preserve a little bit of history in the process. Thank you to those who do take time to read and enjoy my blog and if you like it remember to like and share with your friends!
I’m always looking for topics of interest, so as always, please drop me a comment below.
When I was a kid some of my fondest memories were big family gatherings at my grandma Bessie’s with all my aunts, uncles and cousins. At the center of it all was an enormous table of food. One of my favorite dishes that she always made and I loved to help with as a kid was “chicken and dumplings”.
There are many different variations of dumplings. According to Wikipedia: “a dumpling is a broad classification for a dish that consists of pieces of dough (made from a variety of starch sources) wrapped around a filling or of dough with no filling. The dough can be based on bread, flour, or potatoes, and may be filled with meat, fish, cheese, vegetables, fruit or sweets. Dumplings may be prepared using a variety of cooking methods, including baking, boiling, frying, simmering, or steaming, and are found in many world cuisines.” Whew, that was a mouthful, but for simplicity’s sake we are going to focus on the southern United States version of dumplings. Even narrowing it down to our small region of the world, there are many variations to this classic southern meal. Of course, I always thought my mothers and grandmothers were the best and the ONLY way to make good dumplings but after growing up, marriage and expanding my culinary interests, I have found that there are many very good dumpling recipes out there that are quite different from my families coveted recipe.
For instance, there are drop dumplings versus rolled dumplings. There are dumplings made with egg and without. There are dumplings that use self rising flour and some use all purpose flour. Some dumplings are made with milk, some with broth, and some with water. Some use shortening or butter. I have even had some dumplings that are made using flour tortillas or canned biscuits. Whatever your style, it seems that there is a pride and privilege in making chicken and dumplings from scratch.
The history behind the southern dumpling is actually very vague and some might want to conjure up a story about the depression era and being without many commodities, however that doesn’t seem to be the case due to the fact that the dumpling predates the civil war. I just assume that the southern dumpling or “dumplin” as we call it down here, originated from a melting pot of cultures, where a tired southern momma with a house full of children, didn’t have the time or energy for supper and threw some leftover biscuit dough into a pot of chicken boiling on the stove and low and behold was born the southern staple we love today. Now that is just an exaggeration of sorts but I can see in my mind that happening very well. However it came about, I’m thankful for it and I’m glad that my family has their own version of this classic southern dish that I anticipated eating as a child, and still do as an adult.
Making homemade dumplings is somewhat a learning experience. The more you make, the better you get. In other words practice makes perfect. However, there are still times I make them my family says “not quite your usual mom” or “mom you hit a home run with these”! I still remember asking my grandma for her dumpling recipe. She wrote down 4 ingredients. That’s it. I asked her how much of each, she shrugged her shoulders and said well I don’t know, I just mix it until it feels right. Little did I know then, and I totally understand now, just what she meant by “the feel”.
Dumplings are typically dropped in a savory broth such as chicken stock. Of course homemade is best and if you need to know how to cook a chicken for chicken stock check out my blog post entitled “Chickens, a Love/Hate Relationship”, but for now we will focus on how to make the dumplings. Now you can use an electric mixer if you like, but I still make mine in a mixing bowl, using a fork and my hands. You will need a large mixing bowl, a fork or whisk, plastic wrap or plastic storage bag, a rolling pin, and a pizza cutter or knife.
Separate your eggs and add your egg yolks to your mixing bowl. Using your fork beat the egg yolks until slightly frothy. Then add 1 cup of evaporated milk, reserving the rest (1/2cup) for later. Then add 1 T. Salt. Mix this together. Start adding your flour, 1 cup at a time. (Yes, all you culinary experts, I’m adding my dry ingredients to my wet, it works!) Incorporate your flour, using your fork at first, then your hand. After adding the final cup of flour, knead dough until it becomes smooth and soft. Do not overwork your dough.
You may not incorporate all your flour, that’s ok. Wrap the ball of dough in plastic wrap or place in plastic storage bag and let rest for 20 minutes.
Then divide the dough into three sections. Using a damp cloth with water, clean your working surface. While still damp, take a few Tablespoons of flour and scatter across your work space. Do this to your rolling pin as well. This prevents your dough from sticking to your surface. You may need to add a little flour as you go to prevent sticking. I turn my dough over after rolling a few times to ensure the flour is still on my surface and on top of my dough.
Start rolling out the first section of dough. Be aggressive and put your arm into it. Rolling all directions. The dough is supposed to be elastic and will resist at first, just keep on rolling. I like mine rolled out thin. You should be able to almost see your hand through it.
This recipe puffs up somewhat when cooking so, keep that in mind if you want them thicker. Once you have them rolled out, use your pizza cutter or knife and cut dumplings into strips. This is not rocket science, they don’t have to be perfect, nor uniform in size. Whatever shape and size you like.
After you get them cut, drop them into your boiling broth, stirring after each addition. Repeat the rolling process with the next two sections. Let dumplings cook about 20 minutes then add the rest of the evaporated milk (1/2 cup) to your broth. This thickens your broth to make it nice and smooth.
A note about your broth. Be sure to salt it before the addition of your dumplings. If it tastes salty it’s probably perfect. This was the hardest thing for me to accomplish at first. Also it doesn’t matter if you add your chicken meat before or after your dumplings, or you don’t have to use the meat at all. It’s all personal preference. Also, yes… you can use canned broth, but I don’t. It’s just not the same.
Chicken and Dumplings
1 whole chicken, boiled, remove meat from bones, save broth.
So whether you make your dumplings from scratch like this or use a different recipe, or buy them frozen, or use biscuits or tortillas, I hope you enjoy this southern comfort food at some point in your life. And, if you don’t like dumplings, well I’m sorry, I don’t have anything else to say about that.
I’m ready to hear all the comments about how you make dumplings and your fond memories of them. Remember to let your children help you make them, it’s something they’ll always remember. I know I do!
I have climbed through many fences as a kid growing up on the farm. Just getting through the barbed wire alone without getting hung up or scratched was a feat. Then, you also had to battle those pesky briers that would cling and stick to everything including your skin. So, even if you made it through the fence, you were still painstakingly removing the thorny tendrils from wherever they latched on. These briers were bittersweet, literally. You see most of these vines that grow in the fence rows around here in Arkansas are wild blackberry vines.
Usually around the first week of July was the time my mother, my grandmother, myself and sometimes a few others would get dressed, grab our buckets and tackle the brier patch. “Get Dressed” you may ask? Yes, we had to dress for the occasion. Usually in jeans, boots, long sleeves, gloves and a hat. This attire was to protect ourselves from the briers and the hot July sun. Occasionally we would see a snake, but they usually were the harmless kind that would slither away without harm. However, there are these tiny critters that are invisible to the naked eye, showing up a day or two later, only to find out they have been feeding on you the entire time, that can make you itch in places that you can’t possibly scratch in public or let alone in private without feeling somewhat embarrassed of the fact that your digging in places that your momma told you not to! Yes, I’m talking about chiggars and ticks! Only those who’ve experienced the tormenting aggravation of these parasites will understand what I’m talking about. Oh I’m sure your grandmother, like mine had their preventative measures such as dipping shoe laces or string in coal oil or turpentine and tying them around your pant legs and shirt sleeves. This was to prevent them from climbing up your extremities. Of course spraying yourself with copious amounts of insect spray was also a requirement. Oh and subsequently, taking a bath in a bleach solution was “supposed” to kill them if they were on you after you got home. After “checking” yourself for ticks and removing them, hoping you got them all, you wait…..a day or so. Hoping, praying to God, that you are not plagued by chiggar bites from the depths of hell! Let’s not forget if you do get them (chiggars) to be sure and paint them with finger nail polish, usually clear if you have it, otherwise you have to settle for whatever color grandma has at the time. This was supposed to “smother” them. I found out later in my college years that this parasite did not burrow into the skin, just left a bit of saliva that irritates the skin that causes the severe itching, so painting them wasn’t at all effective. But you did whatever means necessary to relieve yourself from the itching, even if it meant walking around painted polka dot with grandmas Avon petal pink rose nail polish.
Quarts of berries from Scatter Creek Berries and Produce
Beautiful Sweet berries
Huge berries bigger than my thumb!
The rewards of those “berry pickin days” usually out weighed the few days of itching. If you were lucky enough to get a bucket full without devouring half of it before you got home, with everyone combined we had enough berries to make jelly, jam, and of course blackberry cobbler. The wild blackberries are smaller in comparison to the tame varieties. The seeds are not as big and the flavor in my opinion is just so much better. However, if you don’t have time (likeme), or don’t want to fight the chiggars, ticks or summer heat, you can find tame blackberries at your local farmers market or grocery store. We are very lucky to have friends at Scattercreek Berries and Produce that always have a beautiful supply of huge sweet blackberries for sale that are great for recipes, save you lots of time and no pink nail polish! Even though picking wild berries may seem like a lot of trouble nowadays, it has always brought back great memories of time spent in nature, with family, enjoying the fruits of your labor. So, I’m leaving you with my blackberry cobbler recipe, best served warm with Homemade vanilla ice cream.
Unbaked cobbler
Baked cobbler
I bake my cobbler in a 9×13 pan or a large cast iron skillet. You can use the boxed roll out pie crusts, it will take 2 boxes. Or you can make your own. My mother always made pie crust in bulk and put it in the freezer to have on hand. I have included her recipe below.
Blackberry Cobbler:
2 qts. Blackberries
3 1/2 cups granulated sugar
1/2 cup flour
2 T. Lemon juice
1 cup water
1 T. Corn starch
1/2 cup butter
1 tsp. Salt
In a large saucepan, mix blackberries, sugar, flour, lemon juice, and 1/2 cup water together and bring to a boil. Turn down heat and let simmer for approximately 30 minutes or until berries are soft. I mash my berries somewhat with a potato masher(optional). Mix together 1/2 cup water and cornstarch until smooth, add this to your berry mixture. Stir until thickened. Add butter and salt. Stir well. Remove from heat and pour into unbaked pie crust. Top with another unbaked pie crust any style you like. I like cross hatched style on top for my cobblers. You can use an egg wash brushed on top if you like by mixing 1 egg with 2 T. water and brushing it on the crust. This gives a pretty golden brown color. I sprinkle a little sugar on top too. Bake at 350 for approximately 1 hour or until crust is browned. Best served warm with vanilla ice cream. For ice cream recipe click on highlighted link above. Enjoy!
Momma’sFreezerPieCrust:
5 lbs flour
3 lbs Crisco vegetable shortening
3 T. Cold water
3 T. Salt
Mix flour and shortening. Do not over mix. This should be course, with some lumps. Add water and salt. Knead until it forms a nice dough. Pie crust does not need to be a smooth dough. Just until it comes together without falling apart. If dough seems dry add a little more water, or add more flour if necessary to keep from sticking being careful not to add too much. Once dough is formed, separate into smaller sections. Usually, the size of a baseball is good for one piecrust. Divide into appropriate portions. Wrap in plastic wrap, and then place in a freezer bag for later use. Freeze. My mother used old bread sacks, twisting and knotting between each dough ball and put them in the freezer. She usually had four pie crusts to one bread sack, which gave her enough for either two to four pies, depending on if its a single or double crust. Of course this is a bulk recipe, but if you want to cut it down you definitely can to make a crust for the above cobbler. I hope you enjoy this story and recipe. Please give me a like or comment, and follow me at thehandyheifer.wordpress.com. Do you have any memories of “berry pickin days”?
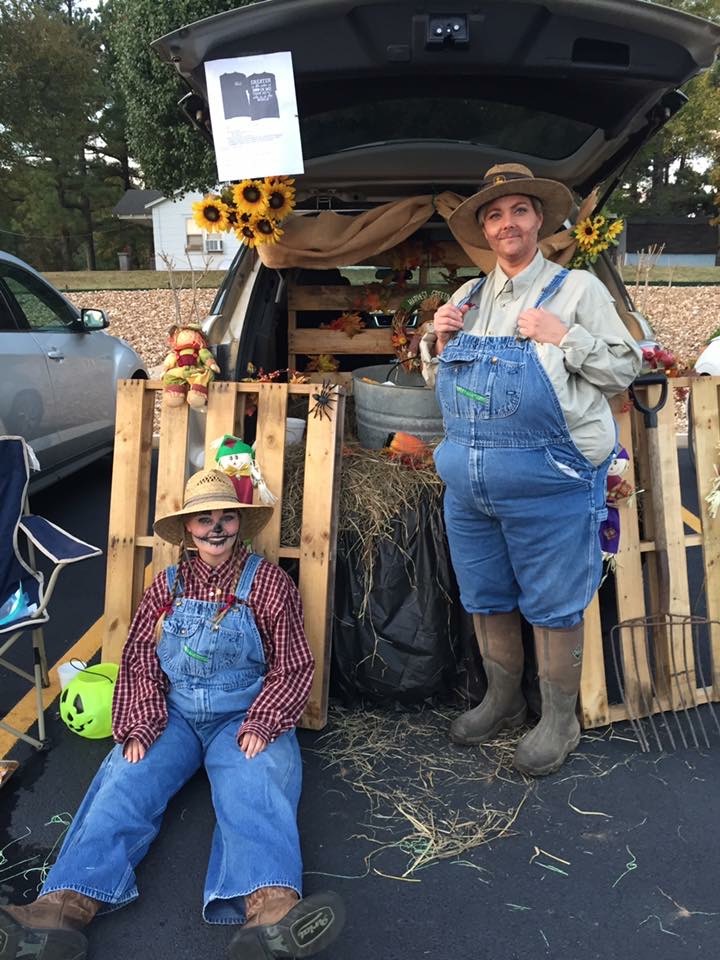
Halloween was never one of my favorite holidays. I was never a fan of being scared out of my wits and the thought of getting dressed up in costume and knocking on doors was just not my thing. However, I did enjoy seeing other kids dressed up and knocking on my grandmas door to get a special sweet treat! So I would spend most of my childhood Halloween days with my Grandma Bessie making and handing out her famous Popcorn Balls!
My daughter and I a couple years ago at our churches trunk-o-treat. Farmer theme.
We spent a couple days preparing the popcorn balls for Halloween night. We had to pop buckets of popcorn. Make the surgery confection syrup to pour over the popcorn. Form the popcorn into balls, and wrap them in plastic wrap. We usually made 150-200 popcorn balls. For a small little town like Lafe, Arkansas – Pop. 200 (back then and not much more now) that was a lot of kids! It never failed we ALWAYS ran out. Those poor little kids that came by after we ran out would say “Awww, no more popcorn balls Ms. Bessie?” She would apologize and say “I’m so sorry, honey Ms. Bessie didn’t make enough this year” and would hand them some Brach’s candy. For those of you old enough to remember, Brach’s candy, like grandma always had around, was found in your local grocery store in a stand that contained several bins of candy. There were hard candies like peppermint and butterscotch, also hard candy varieties like strawberry, lemon, orange and even root beer. There were also caramel’s and coconut chews, maple chews, and my favorite was the caramel chews that were filled with strawberry or coconut, chocolate or raspberry and many more flavors. You could fill a bag with your choice of candy and pay by the ounce or pound. Oh the joys of being able to fill that little paper bag with delicious treats made trips to the grocery store more exciting. However, Halloween at Ms. Bessie’s meant popcorn balls, and if you got Brach’s candy, well; it just was pure disappointment!
Unfortunately, after grandma got older, my mom and myself would help her with the task, but age and time finally took its toll on Ms. Bessie and her popcorn balls and she had to turn her porch light out.
If you’re wondering about food safety issues with kids getting my grandmas homemade popcorn balls that were packaged in plastic wrap, let me just say, we never once had an issue. Nowadays its scary at what extent some people go to hurt kids. So thankfully we have churches and the city parks having trunk-o-treats, were the community gathers together, decorates their vehicles and sometimes themselves and hand out candy to trick -o- treater’s. My mother tried to carry on my grandmothers tradition of making popcorn balls and cereal treats for kids, but she would always write her name on the package so that folks would know where they came from. I have dropped the ball in recent years, usually just buying the large amounts of candy and breaking my bank account in the process. However this is my year! The year I started my blog. They year I started telling stories about my life. The year I’m giving away some of my ownand my families beloved recipes. So this will be the year of Ms. Bessie’s popcorn balls!
I have looked and looked for that recipe without any luck. I came across a written recipe that may have been my moms but it wasn’t grandmas. I know she used molasses in them for sure! I think that is what made them special. It just so happened that I have had several friends give me molasses this year! Coincidence I think not! So I’m giving it my best shot, first with a trial run, and if that turns out well, then to work I will go for popcorn balls at trunk -o- treat this year.
So I have searched different recipes and think I have finally came up with one that is very close to my Grandma Bessie’s. I gave it a trial run and to my glorious satisfaction it proved to be a success! I also gained approval from my daughter and and husband! Even if, this wasn’t my grandma’s actual recipe, I have dubbed them “Grandma Bessie’s Popcorn Balls.”
Grandma Bessie’s Popcorn Balls
12-14 quarts of popped popcorn
3 cups of molasses
2 cups of white corn syrup
1 1/2 cups sugar
4 T. Butter room temp
Extra softened butter(1/4 cup) to use for hands
Salt
Pop popcorn. You can use any method you like. I’m not going to explain how to pop popcorn, if you don’t know how, you might want to learn before trying to make these.
You will need to prepare your work area with large bowls or pans big enough to hold and mix the popcorn with the syrup mixture.You will need 2 large spoons. Also lay out a large sheet of foil and spray it with cooking spray. You’ll need your 1/4 cup of softened butter close to your bowls. Place popcorn into your bowls, evenly distributed. If you have a large pan like an old dish pan that works well too. You can half this recipe, it makes a lot. When I did my trial run, I halved it and it made about 20 medium to large popcorn balls.
Popped popcorn
Molasses syrup
Coated popcorn
Formed into balls
In a large sauce pan, mix molasses, corn syrup, and sugar until combined. Insert a candy thermometer. Grandma didn’t use a candy thermometer. She dropped the syrup in cold water until it made a soft yet sticky ball. However, I use a candy thermometer. Heat this mixture until it reaches soft ball stage on thermometer. Remove from heat and stir in butter. Pour this mixture evenly over your popcorn. Start mixing with spoons to evenly coat the popcorn. It’s ok if you have some not coated. Sprinkle with a little salt to your taste. Allow to cool until your able to touch it without it burning your hands. Coat your hands with the softened butter. Start forming the popcorn mixture into balls. Squeeze tightly. Keep applying butter to prevent sticking. Lay finished popcorn balls on foil sprayed with cooking spray. Allow to cool. Wrap in plastic wrap.
I’m so glad to share this Halloween memory with you. It is one that is very close to my heart, as well as my family, friends and neighbors in our small town community. If you enjoyed this story and recipe please give me a comment, like, share or follow my blog thehandyheifer@wordpress.com.
As I said in my previous blog post “Did somebody say Pickles”, the first recipe for pickles I made came from my grandma Bessie’s recipe box. Hot Garlic Dills. This makes me laugh because when I think of my grandma and pickles, all I can think about is the Kelly green sweet gherkins she always made. You see, these were sweet pickles, very, very sweet pickles! They had food coloring added to them because; well… I don’t know, I guess they weren’t green enough to suit her. But anyway, I really loved them as a kid, and could eat a whole jar! Heck, I even have a baby picture of me teething on one to those pickles. They had a rubbery texture to them. The more I think about it, they probably seemed more like candy to me than vegetables and yes I did make myself sick on them once or twice! The older I got, the less appealing the sweet ones became and I started snacking on the dill varieties. There are all sorts of dill pickle recipes out there; classic dills, hot dills, garlic dills, and sweet dills just to name a few. There are even more “pickle experts” out there that will tell you that you have to use fresh dill, grape leaves, certain size pickles, cut off the bloom end, don’t cut off the end, soak them in salt water and the list goes on and on. I’m no pickle expert, but after trial and error, all I can say is, what works for me may not be what works for some but it has proven to be a winner at my house, my church, and my friends and neighbors. So let’s get to it!
At our house we prefer the smaller sized cucumbers to use for dill pickles. Its really up to you (if size matters). I usually plant a pickling hybrid, found at any local seed supply or department store. Wash them well and I cut off the ends. I’m sure your wondering why? Well, like I said, trial and error. I had problems at first with some of my pickles being soft or having a weird appearance after sitting on the shelf a few weeks. So I asked a few people I knew that had made pickles, and most said to snip off the bloom end. They said that the bloom end sometimes contained a substance that would make the pickles soft and shrivel up. Ok so I cut off the bloom end, but as my OCD began to kick in, I knew the stem end sometimes got left on the plate, and it would be so much more eye appealing to have both ends cut instead of one so….. that’s why I cut both ends off…..end of story.
After washing and cutting off the ends, I soak them in a salty ice water bath for at least an hour. Just cover them with water mixed with some ice, add a little salt (a tablespoon or so), and let them sit an hour or more. If you don’t have time to do them right away just keep them in the refrigerator for a day or two, they will be fine. This salty bath helps to firm them up so they stay nice and crisp.
Next you want to make sure you have your canning jars cleaned and ready to use. There are many ways to do this. Wash them in the dishwasher with a high temp cycle, dip them in boiling water, put them in the oven on low heat for a few minutes, if you don’t understand, I recommend you search how to sterilize canning jars, and I’m sure you will get all the information you need. You also will need lids and rings for your jars.
Hot Garlic Dills
4 cups water
3 cups white vinegar
1/2 cup coarse salt
1 1/2 tsp alum
1 T. Chopped garlic
1-2 tsp. Dill seed
1 medium jalapeño pepper
Drain your pickles from the water but do not rinse them. Start packing them in your jars. We are using whole cucumbers , if you want to cut your cucumbers that’s fine, it’s up to you. Cut off the top of your jalapeño pepper and put it in the jar with your cucumbers. Also I usually use wide mouthed quart jars if I have them. They are easier to pack, but again it’s totally up to you. I try to get as many as I can in a jar. Pack them in tight, leaving a one inch headspace from the top of the jar. Add garlic and dill seed on top of packed cucumbers in jar.
In a saucepan heat water, vinegar, salt and alum to boiling. Turn off heat and ladle hot liquid slowly over your packed cucumbers. Allowing the jars to temper as you go, otherwise if you go too fast your jars may break, due to sudden temperatures change. So take your time. Fill your jars up within one inch of top of jar. More brine may be needed depending on how many jars you have. This recipe usually makes 2-3 quarts. Once jars are filled, clean rims of jars and place lid and ring and screw down tight. Allow jars to sit for 20-30 min. I process my jars in a hot water bath for approximately 10 minutes. To ensure my jars seal appropriately. Take them out and allow them to cool at room temperature. You may hear the popping sound of your jars sealing. That’s good! If your jar lid is still loose or you can push down on the top and it pops back up, it’s not sealed. You can either place this jar in the refrigerator and use later, or you can try to reseal in hot water bath, but when you do you risk softening your pickles, but I have done it myself and it works most of the time.
If you have questions regarding the hot water bath or “cold packer” as we like to call it, please ask me or search it on the net. It’s basically a large pot, with a rack, that you heat to boiling, lower your jars in for appropriate time and then take them out carefully.You can find these at most department stores fairly cheap.
So that’s how I do it.I hope you enjoyed this post and maybe give pickling a try. I hope to post more recipes to try soon. Again, if you try a recipe, or have any questions, please feel free to send me a message and I will do my best to answer. Thanks for reading my blog posts, I really love sharing them with you and hearing your input.
So there’s nothing like fresh garden vegetables right! I think most people will agree with that,whether homegrown or bought from your local farmers market, fresh produce tastes better and is actually healthier for you!
So you decide to plant a garden.Your garden grows abundantly and produces much (we will tackled those that don’t in another post). You are eating fresh vegetables every day but seem to have more to spoil before you can use them all. What are you gonna do with all that produce?
As most of you know by now, I grew up on a farm. As with most farmers, it was commonplace that most grew their own vegetables. We had our garden plot which varied through the years from place to place and also what we decided to grow. However, tomatoes, squash, peppers, cucumbers, corn, okra and peas were always summer staples. Occasionally cabbage, broccoli, radishes, turnips, and other fall varieties of squash and pumpkin made their way into the garden as well as cantaloupe and watermelon. Now we had a potato patch that was a separate plot on itsown and well that’s another story I’ll add to my list of blog posts at a later date. Anyway you get the idea; we grew alot of stuff. My mom preserved or “canned” as we like to call it or even sometimes we refer to it as “putting up” most of the vegetables we grew in some shape or form. Some were stored in sealed jars, some were put in the freezer. Nonetheless we had a supply of vegetables to use throughout the winter months. We stored a lot of these jars and some root vegetables in our “root cellar”. This was a small concrete room located under our house. Kinda like a small unfinished basement. We had shelving for jars and it was our safe place during Arkansas tornado season. It was damp, musty and not very appealing, but it served a purpose and that’s all that mattered to us.
I helped my mother and grandmother from time to time canning vegetables and making jams and jellies, but it wasn’t until after I got married that I really became interested in food preservation. You see not only did I grow up with a vegetable garden, so did my husband! My mother in law was an avid gardener and she grew multitudes of vegetables which she “put up” in all kinds of ways. So I thought to myself? I can’t drop the ball, I got to get in the game! So I did!
I had my grandma Bessie’s old recipe box that contained several recipes for pickles, among other relishes and such. So I found her recipe for “Hot Garlic Dills” and gave it a try! I had a errors along the way, but you got to just keep on trying. This became my go to pickle recipe! I also found her “Bread and Butter” pickle recipe, as well as her “Corn Relish”.All have proven to be great, of course my grandma Bessie never made anything that wasn’t the best! I have came up with a few of my own along the way also,like “Candied jalapeños”, “Cucumber Salad”, and “Sweet Cucumber Relish.
I guess your seeing a theme here right! Isn’t amazing what vinegar mixed with a little salt or sugar and some spices can transform an ordinary cucumber or any vegetable for that matter into a snack that I would venture to say the majority of the human race loves! Isn’t it funny how many people will not eat a fresh cucumber but can eat a whole jar of pickles! I know right!
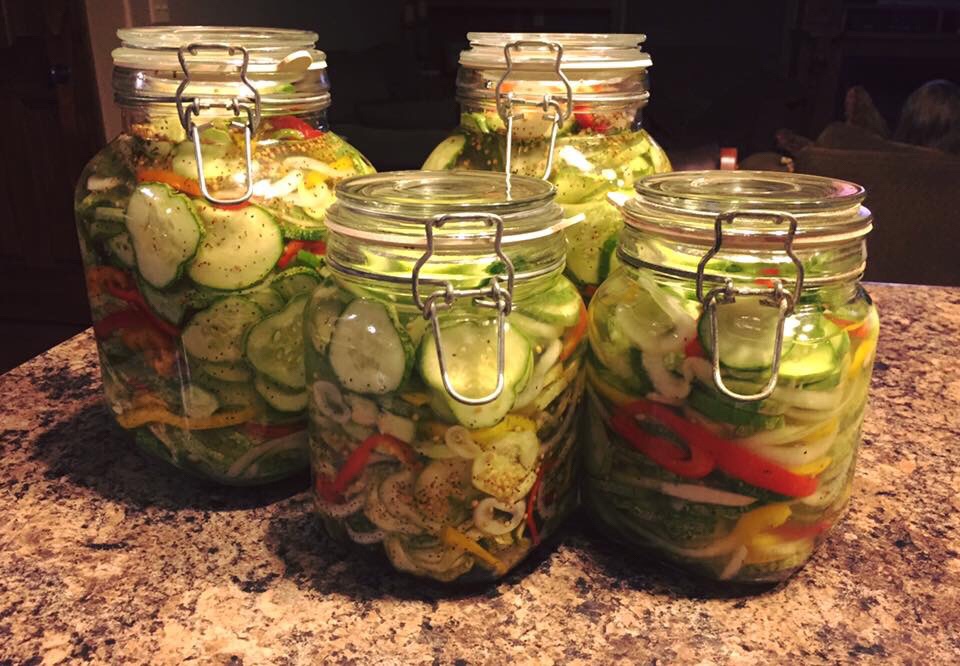
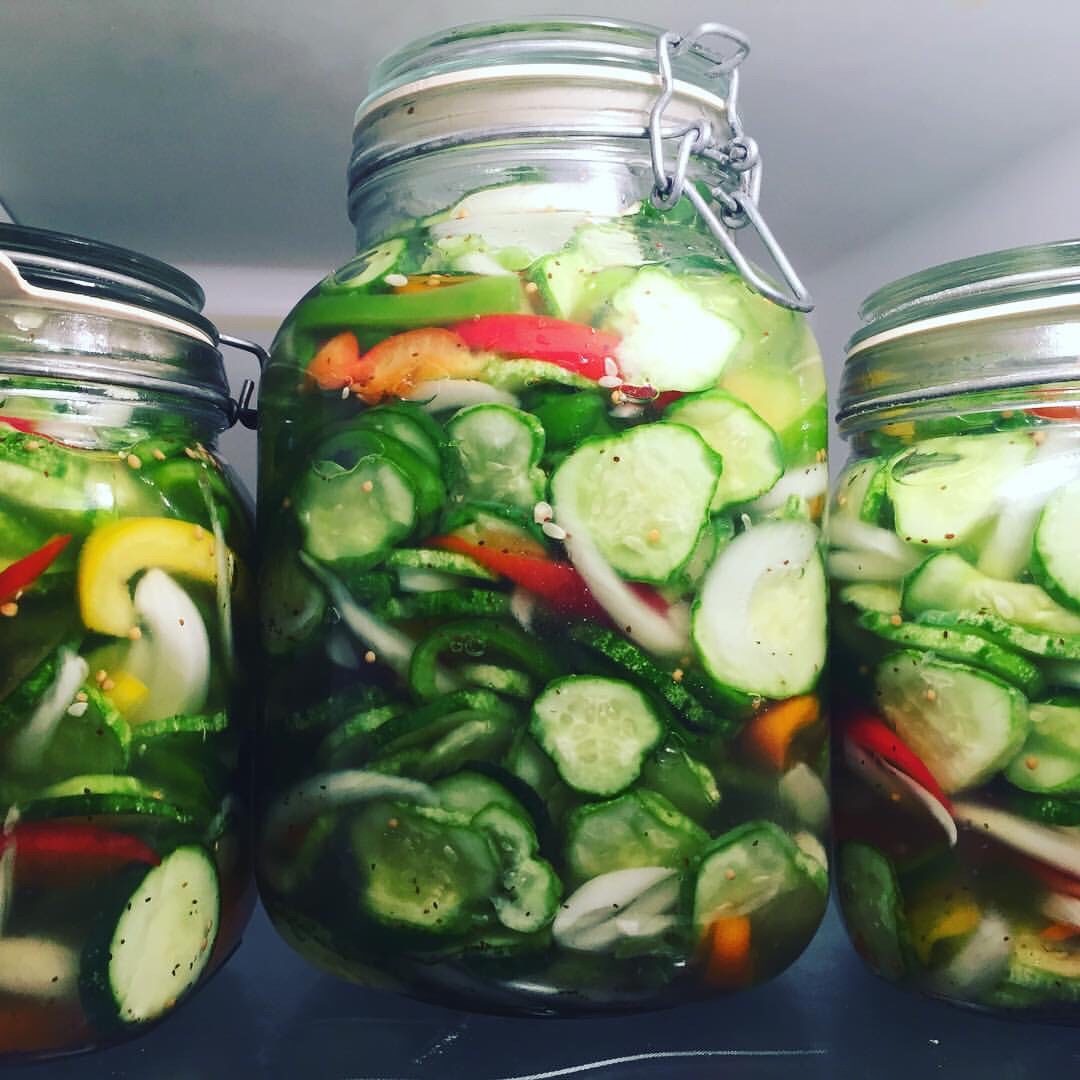
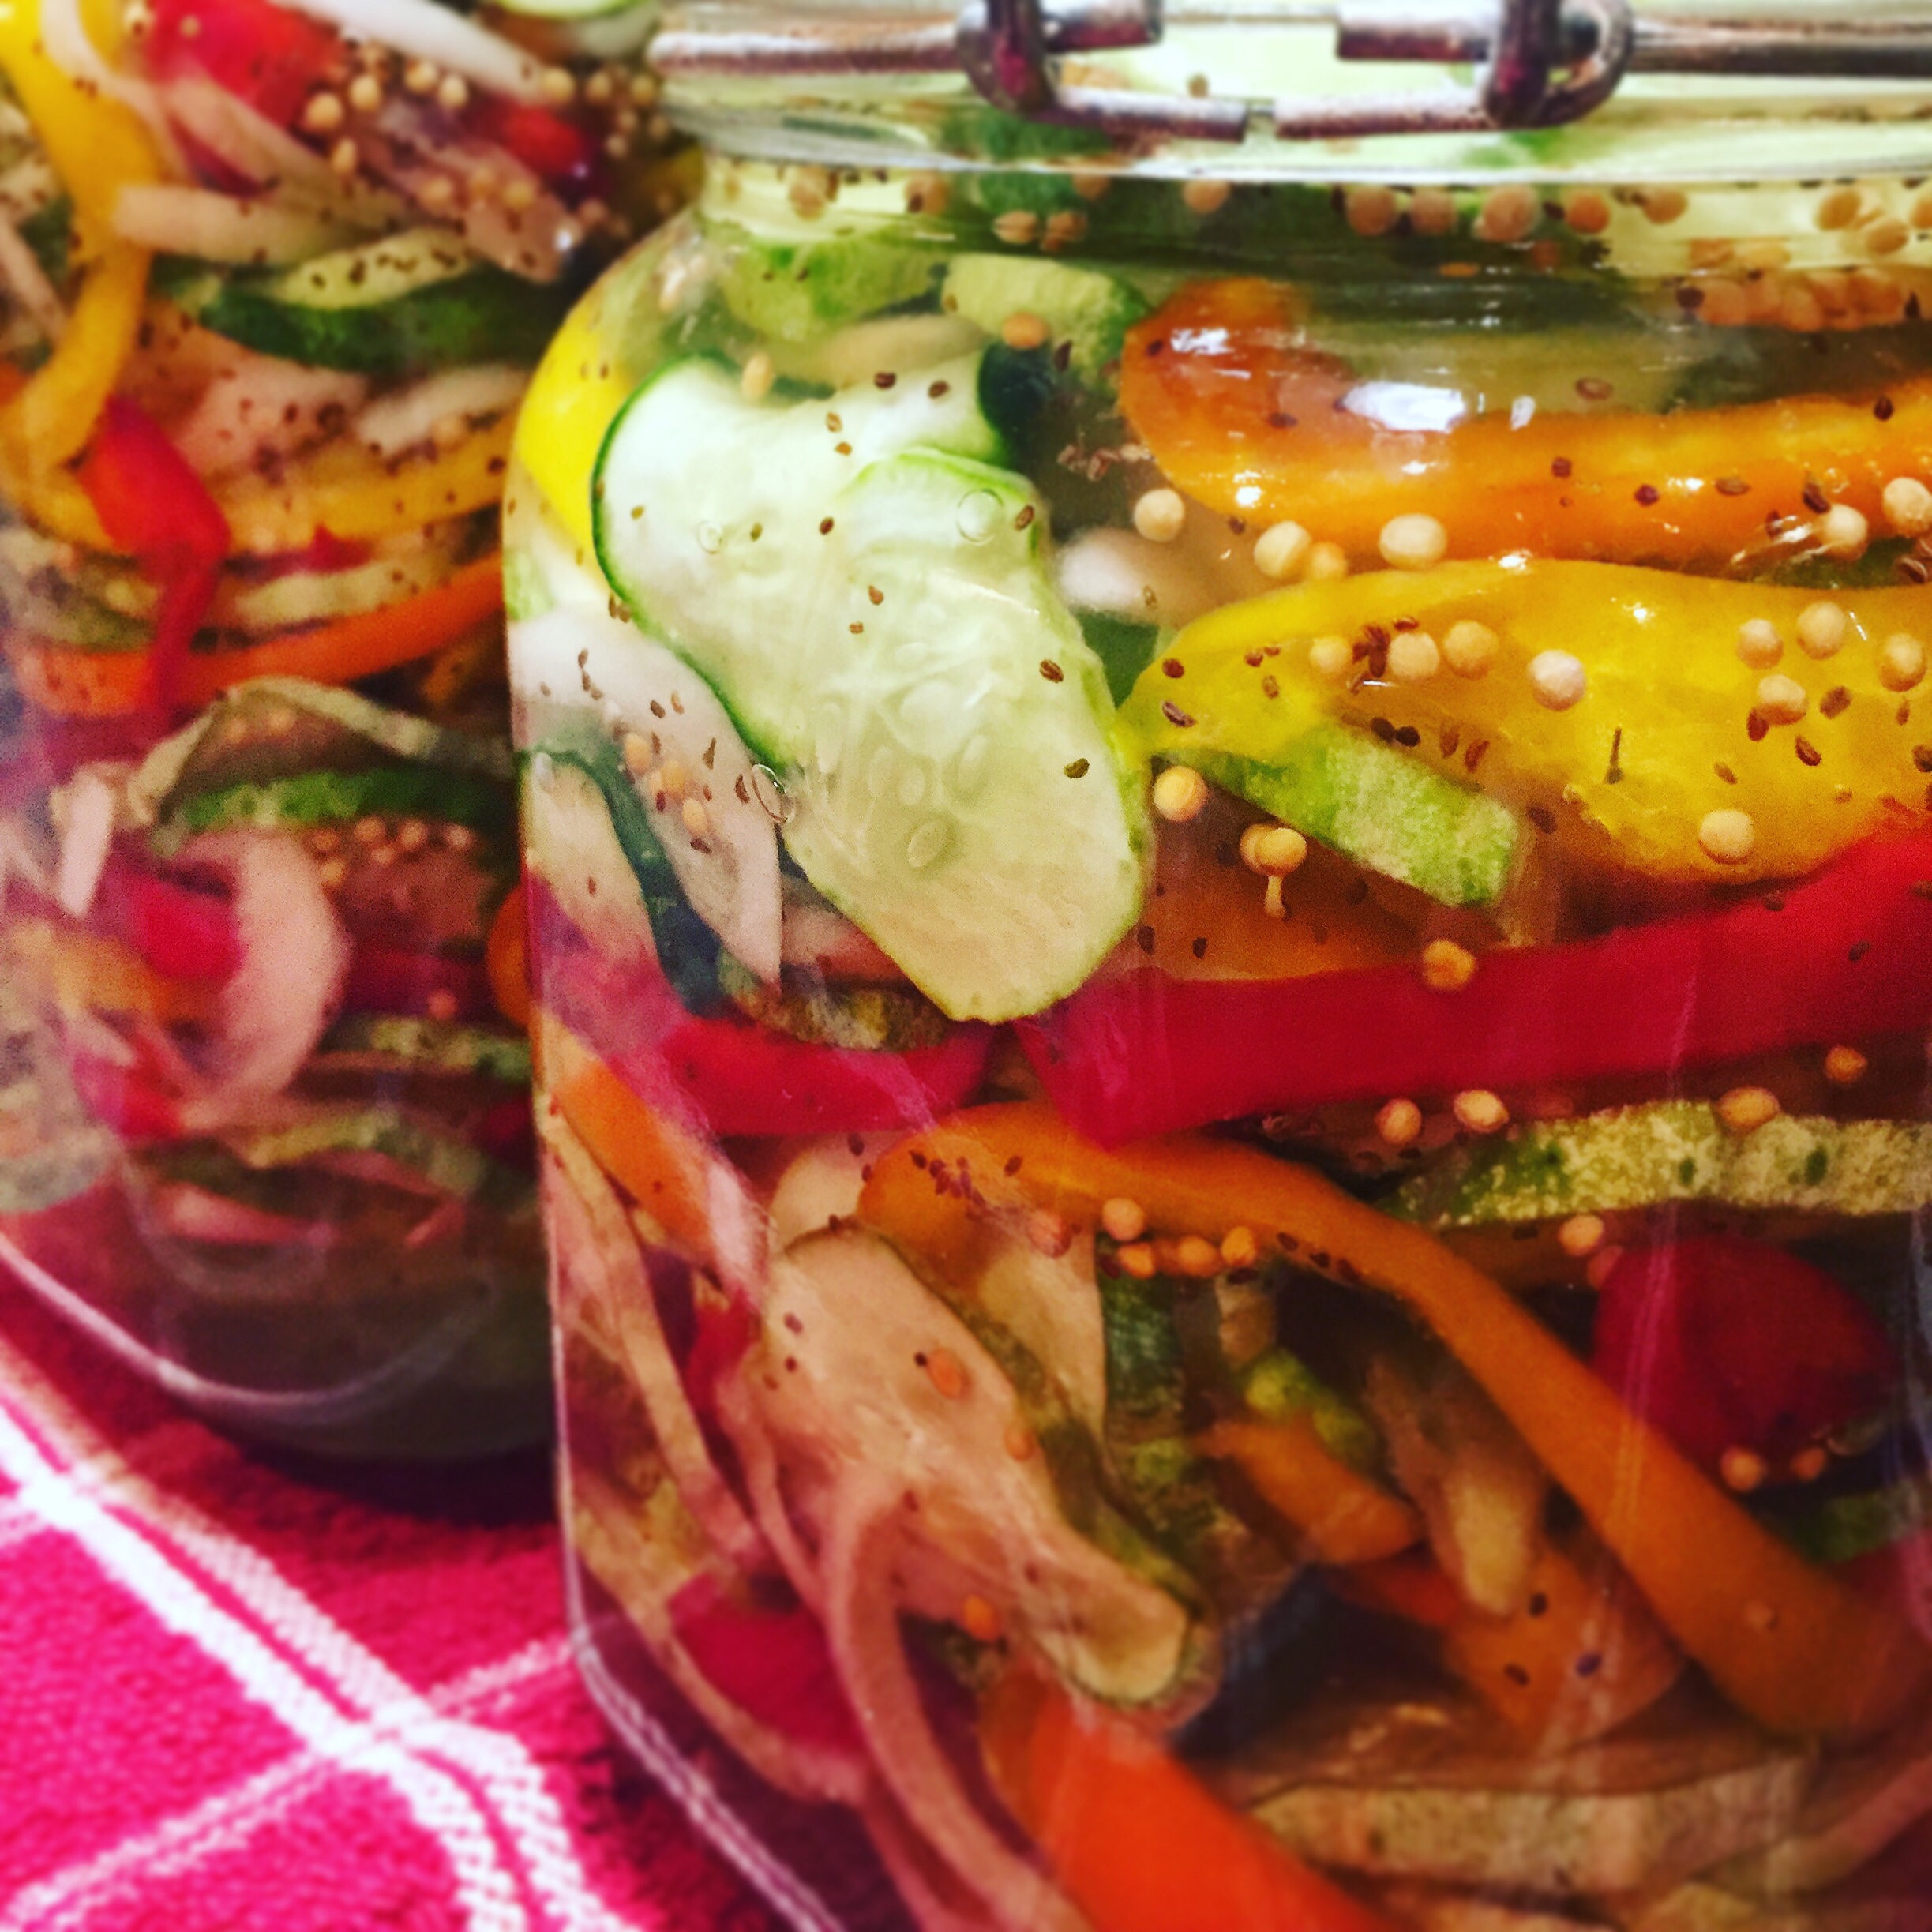
My next few blog posts will be recipes pertaining to pickling and canning. I thought it would be easier to just post the recipes instead of include them all in one post. So let’s get started with probably one of the easiest pickle recipes “Cucumber Salad”.
First let me preface this by saying this requires no processing “sealing jars” and minimal or no cooking. Basically cutting up your vegetables and adding ingredients. I usually double or even triple this recipe. It’s easy so just increase amounts as needed. I have some people ask if you can make this with artificial sweeteners or stevia? Yes you can! You be the judge on how sweet you like it and use accordingly. Ok here we go!
Cucumber Salad:
7 cups sliced cucumbers
1 cup of sliced sweet onions
1 cup of sliced bell peppers
1 cup white vinegar
1 Tbsp. salt
2 cups sugar
1 tsp. Celery seed
1 tsp. Mustard seed
Slice your vegetables. I use a mandolin(watch your fingers). You can use a food processor or you can do it the old fashioned way with a sharp knife and cutting board. Either way cut up cucumbers, onions and peppers. I love to use red and yellow bell peppers for color. I tried purple onion once and it turned my whole jar purple so don’t do that unless you really love purple! Mix all vegetables along with the salt in a large bowl and set aside. In a saucepan, add sugar, vinegar, celery seed, and mustard seed. Bring to a boil just until all sugar is dissolved. Remove from heat and allow to cool. If you use artificial sweeteners you don’t even have to boil this, however I find it works better if you do. Yes, you can use the microwave too! Pack your cucumber mixture into jars of choice. I push them down pretty tight. Then pour your sugar mixture over them until covered. I sometimes have to make more sugar mixture if it doesn’t cover well, but that’s up to you. Place lids on jars. If you don’t have jars, any airtight container will work just fine (hello Tupperware)! Keep your jars in the refrigerator and I like to let them sit a couple days before we eat them. They will keep for months in the refrigerator. Of course I doubt they last that long!
I hope you enjoy this cucumber salad and please send me a picture or a message if you try the recipe. I love to hear about it. Like I said, I will be posting more recipes like this, so stay tuned!
Today June 28, we decided to get up early to make breakfast at Magnolia Table before the crowd got too bad. The restaurant opens at 6:00 am but we arrived a little after 7:00 am. It was already full and they told us that it could be a 30-45 min wait. However, they had a coffee bar so we decided to go ahead and get our coffee while we waited. Before the barista finished making our coffee they text us that our table was ready! That wasn’t really a wait at all! We were seated and after taking several minutes to look over the menu we ordered our food. We had been eating fairly heavy the past few days so I think Hannah and I were ready for a somewhat lighter meal. So we ordered a side of Jo’s buttermilk biscuits which consisted of 3 large biscuits served with strawberry butter. The biscuits were large, soft and buttery, topped off with the strawberry butter; they were to die for! Yummo! Then Hannah ordered Chips Ham Sandwich which was ham, egg and cheese on a croissant roll. It came with a side of their homemade tator tots. I opted forthe Avocado Toast, which consisted of wheat toast topped with avocado and basil aioli served with a soft poached egg and a small side of micro greens dressed with the basil aioli. Both entrees were delicious and just what we needed!
After we left Magnolia Table, we decided to visit the suspension bridge and the longhorn monuments. The bridge is over the Brazos river and was used initially during cattle drives to heard the cattle across the river during the Chism trail rides. It was very neat to see.
Afterwards, we then headed to Magnolia Market were we perused all they had to offer, which is a lot! From the market to the garden, to the bakery, to the food trucks and the lawn it’s a fun place. However, it is hot outside and I definitely would recommend going in the morning when the sun is not so bad. We went to the bakery and had minimal wait. We ordered a lavender lemon cupcake, a nuts and bolts cupcake, and a strawberry and cream cupcake, which we shared and they were all delicious! We also had an Alabama Sweet Tea from the food truck. We ordered the Mason Dixon, which was 1/2 & 1/2 sweet to unsweet. It came in a large quart sized mason jar with lid and straw. Good stuff!!!
We decided to take the trolley to some more shops that were on our list of things to do, and we walked a lot in the sun and heat until I finally gave out and was ready to sit down so we cooled off and grabbed a bite to eat at The Olive Branch. A small soup, sandwich and salad shop that also serves fresh ground coffee. I had half a turkey BLT with a cup of chicken enchilada soup and Hannah ordered a Cesar salad with a cup of the same soup. All was very good! We then regained some energy to walk some more until we caught the trolley back to The Silos.
We decided to go uptown to a few shops and then returned to Heritage Creamery for some awesome Ice cream before heading back to the hotel to rest.
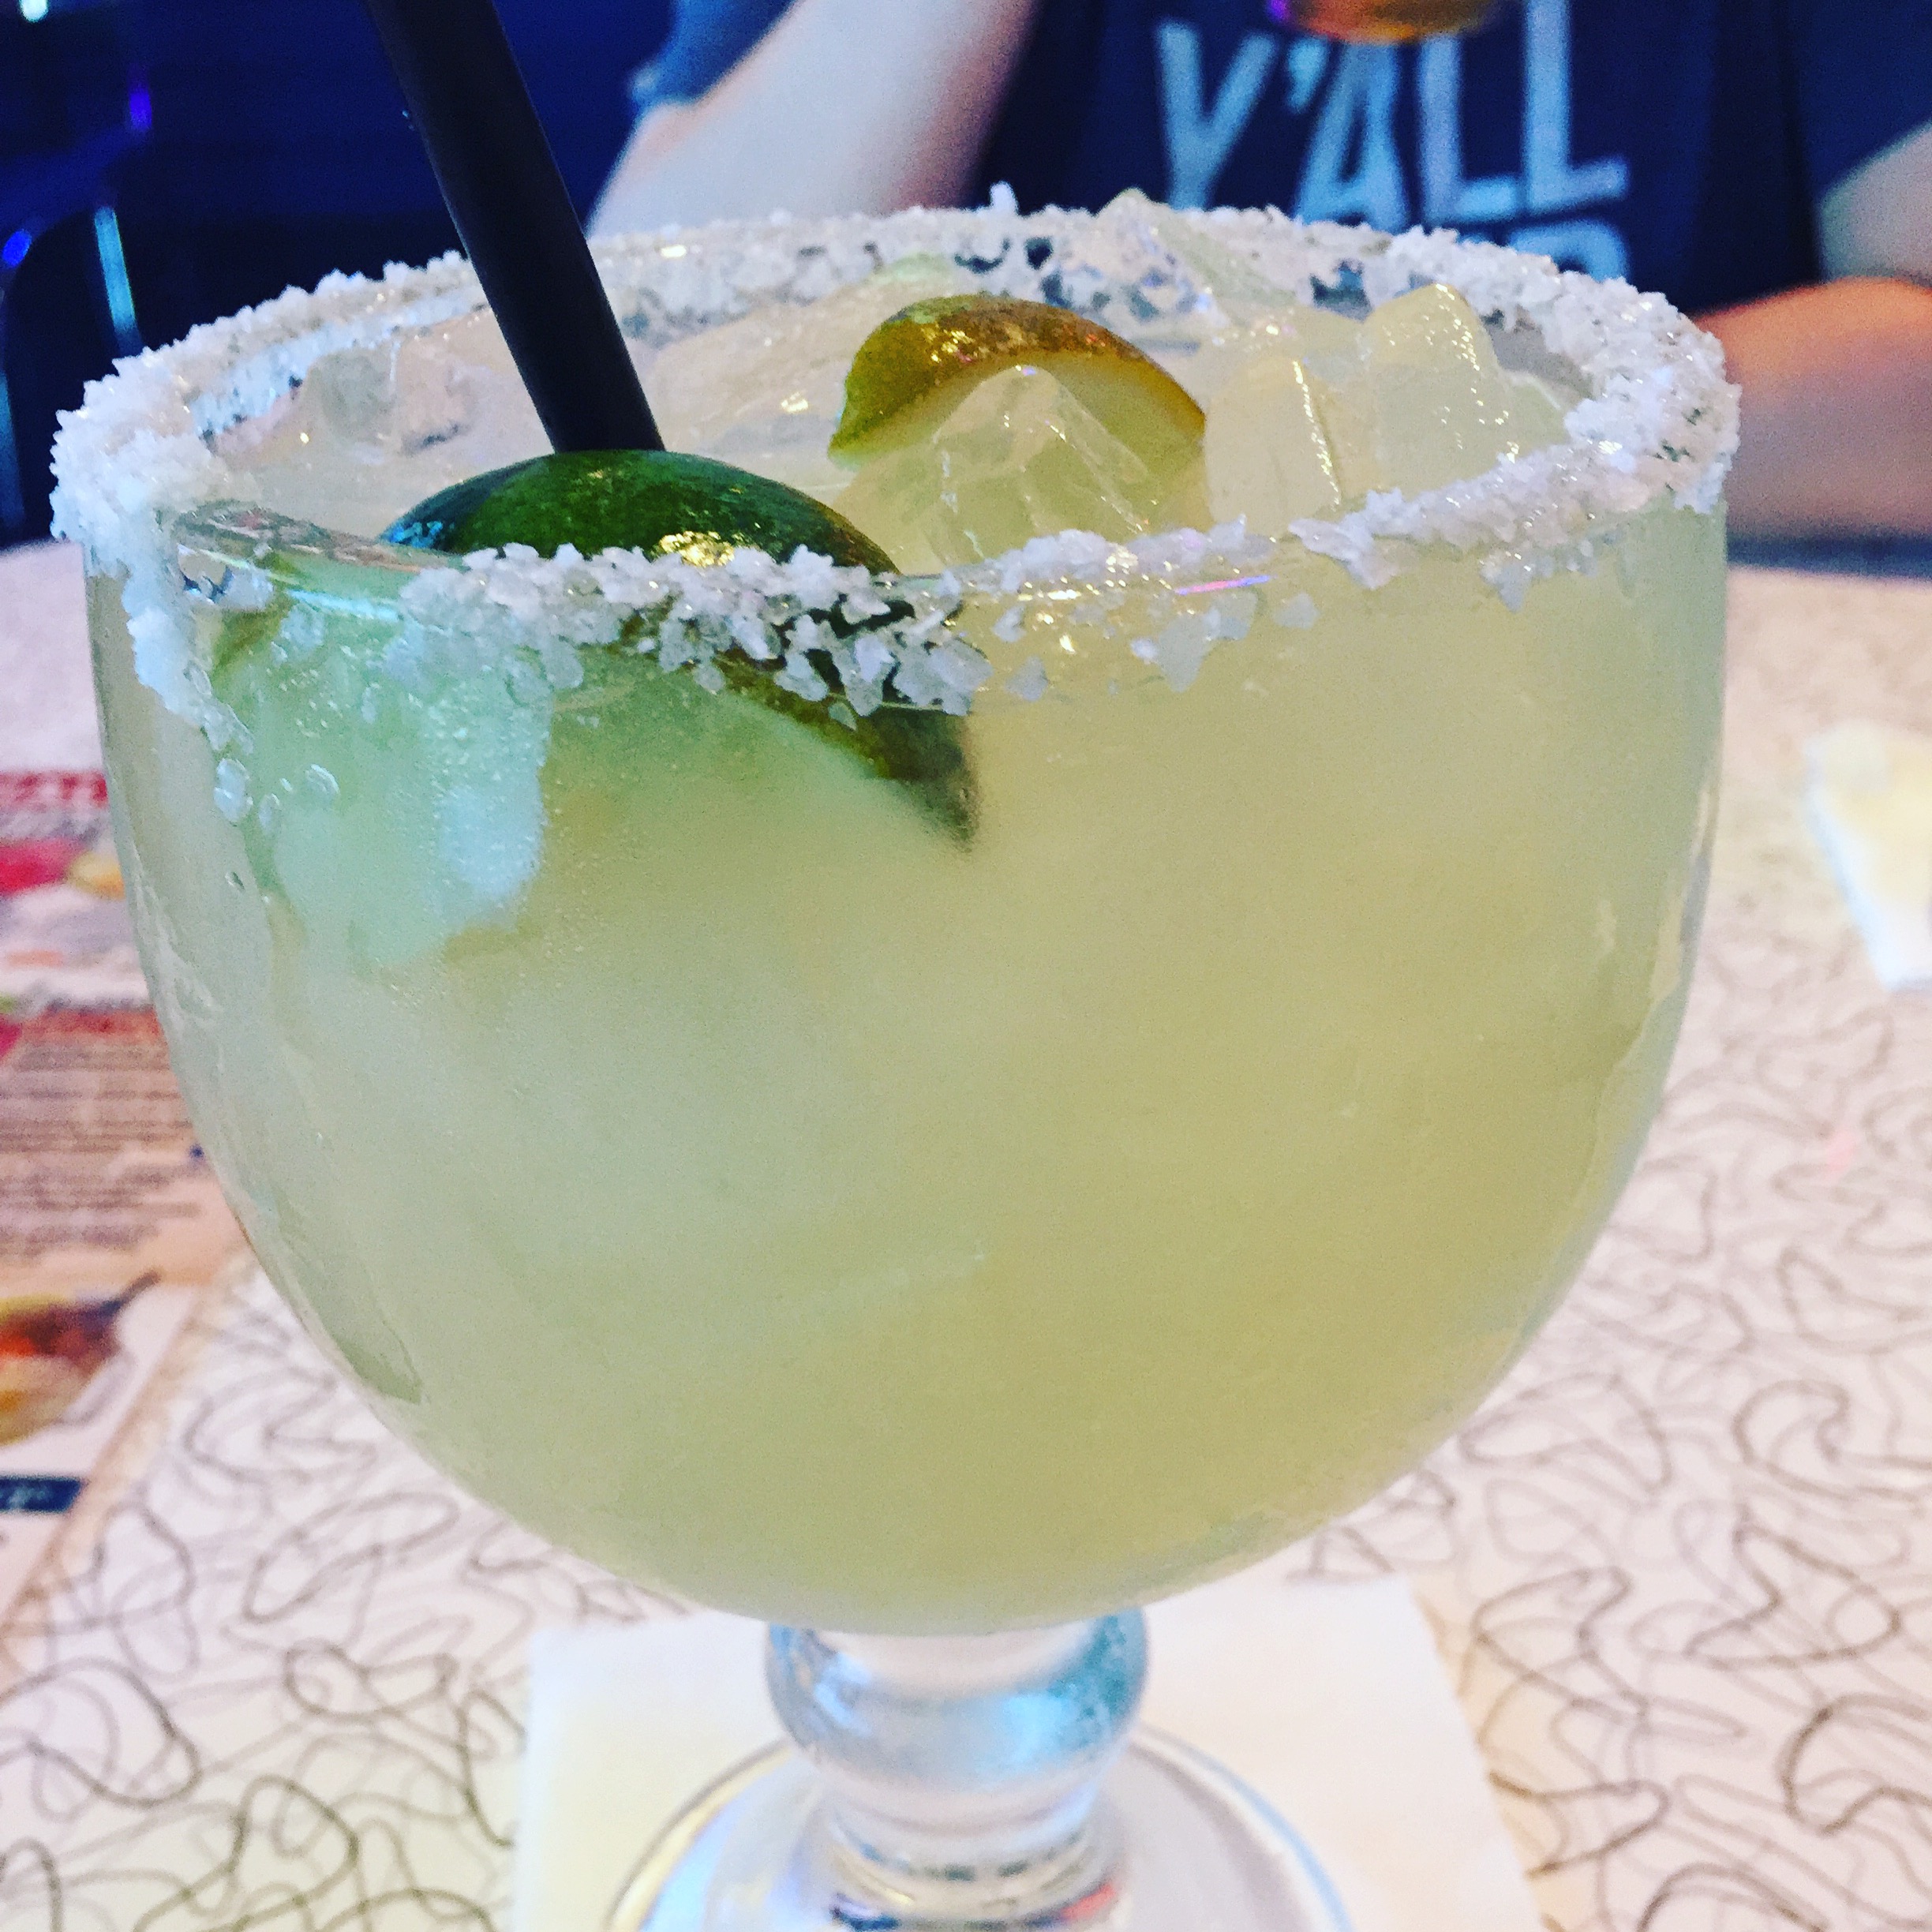
After resting a bit and starting to watch the final game of the College World Series, we decided to visit Bubba’s 33, a restaurant next to our hotel. It had everything from steak to pizza on the menu and a great margarita!
We watched the game on many of the big screens they had in the restaurant, finished our meal and headed back to the hotel. Unfortunately our Razorbacks didn’t win, but I’m proud of them nonetheless! We are planning on leaving Waco and heading back to our Natural state tomorrow. Stopping in Arkadelphia to visit my son then heading toward Marmaduke sometime Saturday afternoon.
Today we took a tour of Waco through Waco tour company. It was about a 2 1/2 hour tour of Waco via a small bus and a great guide. We went by several of Chip and Joanna Gaines fixer upper houses, the Silos, Harp Design Co., and several other interesting shops, landmarks and historical markers. Our tour guide “David” was great! They are a Christian based company and we started the tour with a prayer which I thought was an A+ in my book! He also took several pictures of us on his phone, text them to us and told us if we had any questions while we were in town just text him and ask. If you come to Waco, I totally recommend Waco tours. It’s well worth your money!
After our tour was over, we decided to walk around and find a few places that were recommended by the tour but also was on our checklist of things to do in Waco. Our first stop was at Schmaltz’s, known for the best sandwiches in Waco. It did not disappoint. The bread was amazing! I had turkey and swiss on wheat bread. I also ordered a cup of their Wisconsin cheddar soup. Hannah had pastrami and swiss on wheat with a side salad. They bake their own bread and all meat is sliced thin and sandwich is heated on the griddle to melt the cheese and give a nice crispy exterior to the homemade buns. It was by far the best sandwich I have had in a while. The bread is to die for no doubt!
Next we walked to the “Findery”. A beautiful shop that Joanna lists as one of her favorite places. It was an old two story building that was refurbished to house all things rustic, farmhouse decor! I will say it was quite pricy but beautiful nonetheless. We walked and visited several small shops and then decided to tour the Dr. Pepper Museum. It was more interesting to me than Hannah because I remember more about the older Dr. Pepper bottles and memorabilia than she does. Very interesting and a must do while in Waco. We then walked to “Spice Village”. It houses over 60 different shops under one roof and there is something for everyone. We spent probably 1 1/2 hours in there!
After all that walking in 103 degree heat, it was definitely 5 o’clock somewhere and that just happened to be “Ninfa’s” Tex-mex restaurant next to spice village. It was recommended by a lady we met in Fort Worth, also by our tour guide and was on our list of best places to eat in Waco. It was great! I had BBQ brisket Nachos and Hannah hadenchiladas. We had a coupon from the tour company for a free chips and queso and we topped it off with a margarita on the rocks! Definitely recommend eating there.
We started our tour at 9:30 this morning and we got back to our hotel around 6:30 this afternoon. We needed showers and to rest our feet as well as watch our Hogs play game 2 of the College World Series! WPS!
Tomorrow we will do Magnolia Table, Magnolia Market, Bakery, Gardens, etc…., and plan on the suspension bridge and a few other landmarks, shops and eateries along the way! Follow me on fb and instagram for any other details I may have left out of my blog. It’s been fun so far!
We left out on a rainy Sunday morning, June 24, at about 8:45 am for our mother/daughter Pawhuska to Waco road trip. We traveled up 67 to Poplar Bluff, Mo then onto 60 through Van Buren, Winona, Mountain View and past Joplin, where we got on 44into Oklahoma. It rained on us most of the way. We stopped to eat at a Mexican place and to escape the rain for a while. Next we traveled past Miami and Vinita, then hit 60 again over to Bartlesville, Ok, where we stayed at the Hampton Inn. We arrived around 4:30 that afternoon, so total time was about 7.5 hours. The hotel was having problems with their internet connection so that’s why I’m late in writing this blog. We decided to go down the street to Luigi’s Italian Restaurant for dinner. It was very good. Hannah had the Italian sampler platter which included spinach ravioli, lasagna, and cheese manicotti topped with a homemade marinara sauce. I had cheese tortellini ala panna. We both had salads and of course bread was brought to the table. It was delicious and we both left stuffed!
Luigi’s tortellini ala panna
Me and my girl
The next morning, Monday June 25, we got up early and headed toward Pawhuska around 7:15. Hopeful to get there early to not have to wait in line very long to eat at “The Mercantile” restaurant. We arrived around 7:45, parked easily, and only waited about 15 minutes before being seated for breakfast. The building is beautifully restored with a rustic feel. We had water in quart sized jars and we both ordered a mocha latte which arrived at our table in signature cups and saucers topped with a beautiful barista design floating atop of our coffee. We both decided to order the “Pancake Breakfast” which included: 3 pancakes topped with 3 flavored butter samplers, 2 eggs, sage sausage and crispy bacon. They serve 4 different flavored syrups with the pancakes. Classic maple, aged Vanilla cinnamon, Orange zest and Clove, and Sea salt Caramel. Our favorite was the aged Vanilla cinnamon or the classic maple. Her menu is simple and not overwhelming, fairly priced and largely proportioned. We received our lodge tickets from our waitress and after finishing breakfast we decided to make the 12 mile drive to tour the lodge where she films her show. We enjoyed the drive and after about 6 miles on gravel, we arrived at the lodge. It is a beautiful cypress home located on top of a hill overlooking the ranch. The home was occupied by Ladd prior to their marriage, and was remodeled and used as a guesthouse and of course to film her food network show “The Pioneer Woman”. There was a gentleman named “Bill” that was answering questions while people looked around and took pictures. We were told a lot of information about the family and the ranch. They own approximately 100,000 acres over 156 square miles. They have approximately 2000 momma cows and 1000 steers. They also run about 1000 wild horses for a government program. They have 7 full time employees other than the family. Ladd, his brother Tim and his dad Chuck own and operate the ranch in Pawhuska, however they have Drummond Ranches in Texas and Kansas that other family operate. Hannah got to see the two yellow labs and the healer dog before we left. She was disappointed that she didn’t get to see the Bassett’s however Bill said they show up last everyday. Ree and Ladd live down the hill from the lodge and you can see their red rooftops in the distance. I was pleasantly surprised that there was no fancy frills or staged props. It looked lived in. I overheard one lady say “she was disappointed that it wasn’t as big as she had imagined”. I guess 5-6 bedrooms with their own full baths, a huge fireplace and living area, kitchen, dining room as well as a new addition of an industrial style prep kitchen, just wasn’t as big as she imagined it would be. Insert eye roll here! I thought it was perfect, and Hannah said it was “house goals” lol!
After leaving the lodge, we returned back to Pawhuska, where we walked and shopped before returning to “The Mercantile” bakery to have some scones and lemonade. We continued to do a little more shopping before eating supper at her new pizza restaurant “P town Pizza”. It was real wood fire oven roasted pizza. We had the “What a Fun-gi” pizza, which was basically a portobello mushroom pizza, but very well done. We also had an appetizer called “Not Knots”, which was small bites of deep fried garlic pizza dough, sprinkled with Parmesan cheese, served with marinara sauce and ranch dressing. Everything was delicious and of course we left stuffed again!
We returned to the hotel in Bartlesville around 6:00 pm, where I had hoped to watch the Razorbacks play in the College World Series, only to find out they were in a rain delay, so we watched the movie “The Jersey Boys” instead.
The next morning, June 26, we left Bartlesville, Ok at approximately 9:00 am and headed to Waco, Tx via interstate 35. We decided to stop by the Fort Worth Stockyards along the way for a few hours and so glad we did. We saw the longhorns and watched them drive them through town which the do twice a day at 11:00 and 4:00. We also stopped in at the cowtown winery for a wine tasting and met some locals that gave us some tips about Waco. They told us to grab a bite to eat at the “Love Shack” before we left so that’s what we did! Great burgers! I would love to go back to Fort Worth to stay longer. It’s a very interesting area. We got into some construction and traffic in the Fort Worth area but all in all we made good time and arrived in Waco at approximately 6:30 pm. Just in time for me to see my Razorbacks play ball in game 1 of the College World Series! Go Hogs!
For more pictures and videos, visit my fb page “The Handy Heifer”.


 We watched the game on many of the big screens they had in the restaurant, finished our meal and headed back to the hotel. Unfortunately our Razorbacks didn’t win, but I’m proud of them nonetheless! We are planning on leaving Waco and heading back to our Natural state tomorrow. Stopping in Arkadelphia to visit my son then heading toward Marmaduke sometime Saturday afternoon.


